|
|
Post by nikeajax on Apr 16, 2014 10:02:09 GMT -8
If you've ever discovered that the valve seat on your second stage is damaged, here's how you can repair it. While working on my Dacor Olympic I noticed that I just couldn't get it to stop the flow of air coming out. I noticed there was a very small nick in the seat. With a small center-punch: 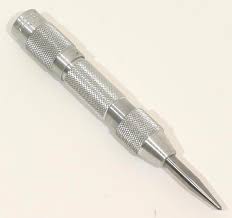 carefully put it into the end of the valve seat, then slowly turn: you're trying to flair out the indentation/nick. Once you have done this, take some wet 600+ grit wet/dry sand paper and rest the valve on it. Carefully work the valve seat back and forth about four or five times--GENTLY!!!!! I've done this twice so far and it's worked perfectly each time: these parts are no longer made, as we all know, and the only other option is to buy yet another second stage to cannibalize it from, then you're stuck with more parts! Jaybird |
|
|
|
Post by diverdon on Apr 16, 2014 10:48:31 GMT -8
Thanks for the research Jaybird. You need a Gopro with a short tripod to watch you in action. Well, maybe  |
|
|
|
Post by herman on Apr 16, 2014 11:22:13 GMT -8
A few words of caution. The orifice is a knife edge and needs to be kept as close to the original shape as possible. At times polishing them off is the only way to restore them but it needs to be kept to a bare minimum to retain as much of the performance of the seat as possible. A broadly rounded off seat can be almost impossible to make seat and at the same time allow you to set the cracking pressure to anything reasonable. I usually use 1500 to 2000 grit paper, it takes more time but reduces the chance of overdoing it. The paper needs to be taped down to a good flat surface. A pane of glass or a slick shinny ceramic floor tile works nicely. When lapping the seat, use light presure and a slow broad figure 8 pattern rather than a back and forth motion, rotating the seat in your fingers every couple of loops of the figure 8. This helps cancel the tendency (which we all do) to rock the orifice from one side to the other which will pretty much destroy the seat if you are not really careful.
|
|
|
|
Post by nikeajax on Apr 16, 2014 11:29:01 GMT -8
Ostrpir8, Robb, has been really busy, but we're working on a couple of Jaguar-spearguns: when he gets some time we're going to do a video of that.
My wife is always yelling at me to, "Take pictures!" of my work: I never do things half-way, and dive in head first, so I get carried away with the task at hand. As is usually the case with me, the job is done before I know it. Next time I do this I'll take some pix...
Jaybird
|
|
|
|
Post by nikeajax on Apr 16, 2014 11:59:12 GMT -8
Herman, thank you for that excellent advice  I have found that sometimes all that needs to be done is to just straighten the edge: I have done this by pushing a drill-bit, blunt-end first though the back and pushing the dent out, then straightening it with the center-punch. This is very much the same idea behind using a knife-steel... Again, this is a very tricky procedure, and it's very easy to go from bad to worse, but sometimes there is no other choice... Jaybird |
|


 I have found that sometimes all that needs to be done is to just straighten the edge: I have done this by pushing a drill-bit, blunt-end first though the back and pushing the dent out, then straightening it with the center-punch. This is very much the same idea behind using a knife-steel...
