|
|
Post by vance on Dec 26, 2018 18:07:28 GMT -8
Thanks, John. I think I'll make another couple out of Delrin. This one works, but needs a bit of refinement. I used brass because I had a botched second stage that was just right for repurposing. Delrin is great to work with, cheap, and plenty strong enough for low pressure stuff.
The hardest part is making the retainer. I have a big chunk of stainless countertop I salvaged from a commercial kitchen remodel that is just the right thickness. I used a piece of it for this one. A piece of brass flat stock would be easier to work, but the stainless is free and isn't THAT bad.
It's kind of funny that the most expensive, time consuming, and difficult part of making this kind of stuff is sourcing and making tooling.
|
|
|
|
Post by SeaRat on Dec 26, 2018 19:45:28 GMT -8
I took the garbage outside and went to my dive shed, and I do not have those seats, unfortunately. It looks like you need them for the Clipper-2. Is that correct?
I say that because at first I was thinking you needed it for the second generation Dacor double diaphragm regulator, which has a very different setup.
John
|
|
|
|
Post by herman on Dec 27, 2018 4:20:28 GMT -8
Welcome to the world of machining. It's not uncommon to take hours to make a jig to hold something and then the actual work to take a few minutes. Setup almost always takes longer than the job for one offs.
If you are making more of the IP gauges, consider doubling the width of your stock, drill the center hole then cut the piece in half with a dremel cutoff blade (or band saw if you have one).
You might try to use the gaskets off a USD DAAM/RAM. VDH has them in phenolic and nylon. No idea if they will work but they should be close. If you try the nylon ones, go easy on the torque. They will extrude and fail if torqued too much. The phenolic ones can take a good bit more torque but don't seal as well if you have any sealing surface damage. I can get you dimensions if you need them, I keep them on hand.
|
|
|
|
Post by vance on Dec 27, 2018 8:48:32 GMT -8
Welcome to the world of machining. It's not uncommon to take hours to make a jig to hold something and then the actual work to take a few minutes. Setup almost always takes longer than the job for one offs. If you are making more of the IP gauges, consider doubling the width of your stock, drill the center hole then cut the piece in half with a dremel cutoff blade (or band saw if you have one). You might try to use the gaskets off a USD DAAM/RAM. VDH has them in phenolic and nylon. No idea if they will work but they should be close. If you try the nylon ones, go easy on the torque. They will extrude and fail if torqued too much. The phenolic ones can take a good bit more torque but don't seal as well if you have any sealing surface damage. I can get you dimensions if you need them, I keep them on hand. Thanks for the advice Herman. I do appreciate it! BTW, look for a package coming your way. I'm assuming you mean to double the width of the sheet metal stock. I did think of that, but it would not result in 2 clamps because a half circle isn't enough engagement in the groove to hold the adapter in solidly. Since I had to file it anyway, I just filed the whole thing out. I could drill two holes a bit apart, cut it in half, and file out the straight sides, come to think of it. I tried the phenolic washers for a replacement brass washer. Too small. |
|
|
|
Post by vance on Dec 27, 2018 9:13:45 GMT -8
I took the garbage outside and went to my dive shed, and I do not have those seats, unfortunately. It looks like you need them for the Clipper-2. Is that correct? I say that because at first I was thinking you needed it for the second generation Dacor double diaphragm regulator, which has a very different setup. John Thanks, John. The LP seat I need is for the C-2. The C-3, C-3N seats are larger than the C-2s. I actually have NOS LP seats/levers for the R-1,2. That was a crazy idea, gluing the seat to the lever. I guess the early US Divers horseshoes levers had the seats glued on, too. I don't suppose the designers considered the convenience of us tinkerers 50-60 years later! |
|
|
|
Post by vance on Dec 27, 2018 9:43:27 GMT -8
I want an old R-1,2 style body, rather than the newer type, due to the second stage design. The original models have a threaded hole and a screw-in LP seat. The orifice is on top, and the demand lever has a rubber seat glued on. The spring under the demand levers closes the second stage orifice. Very simple. The newer ones have a more complicated second stage and lever system. I'd like to try to make a screw in second stage that has the lever mounted to the top ala the Trieste(and most single hose 2nds). A seat will have to be inserted at the bottom of the hole or the LP valve body, maybe like the Healthways/Sportsways valves have. The 2nd stage hole is small. It might need to be bored out. Dunno if there's room for it, though. Here's the diagrams of both types. Note the nozzle #21 and lever #22 (the rubber seat is glued onto the underside of the left end of the lever): 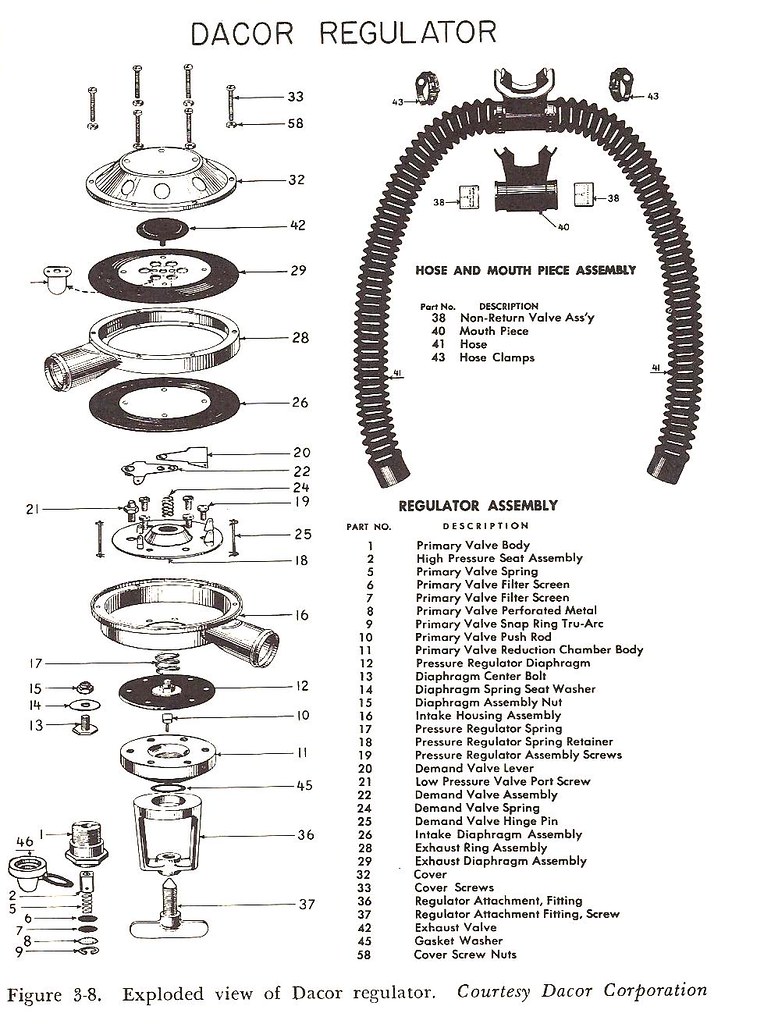 Note the LP body #37: 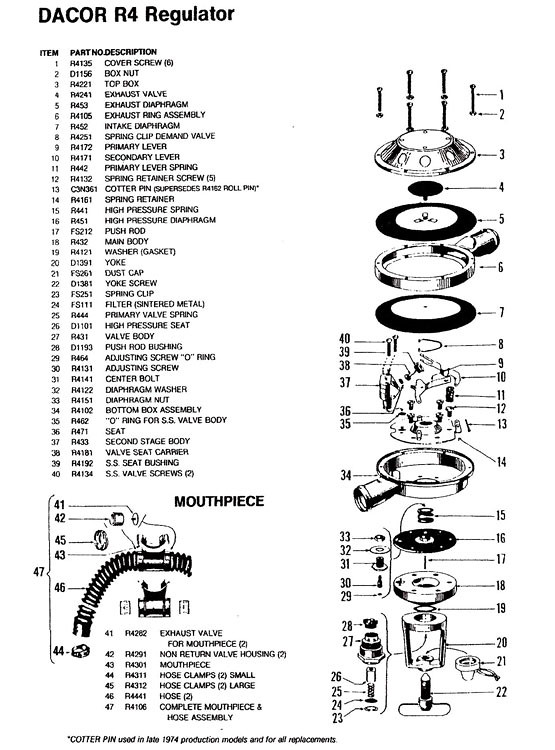 |
|
|
|
Post by SeaRat on Dec 27, 2018 12:32:50 GMT -8
'Just a small note here, but you don't want the Dacor R-1 or R-2. These are the very early models, and the nozzle is at the 3:00 position relative to the intake horn. You actually want the Dacor R-3 Dial-A-Breath regulator, which is their third generation, and has the nozzle right adjacent to the intake horn, so the air is deflected right down the intake hose. This creates a Venturi effect, which some divers did not like, so there is a vane to deflect air, essentially making the regulator harder to breath. Your diagram does not reflect this change, and also (if you look closely) show the 3:00 position of the seat.
The R-4 retained the "Dial-A-Breath feature for a number of years, but updated the LP seat design and lever system. It was possible to completely update a R-3 to a R-4 by buying parts, which I did in the late 1970s. That means the LP hole was the same throughout the lives of the various models.
John
|
|
|
|
Post by vance on Dec 27, 2018 14:16:38 GMT -8
I've been working on my now functioning C-2 with the modded body. The IP on this was way high and blowing past the LP seat. After setting to to 130 or so, it now works correctly, even with the soft silicone LP seat. I don't trust it, and will replace it with a better one. 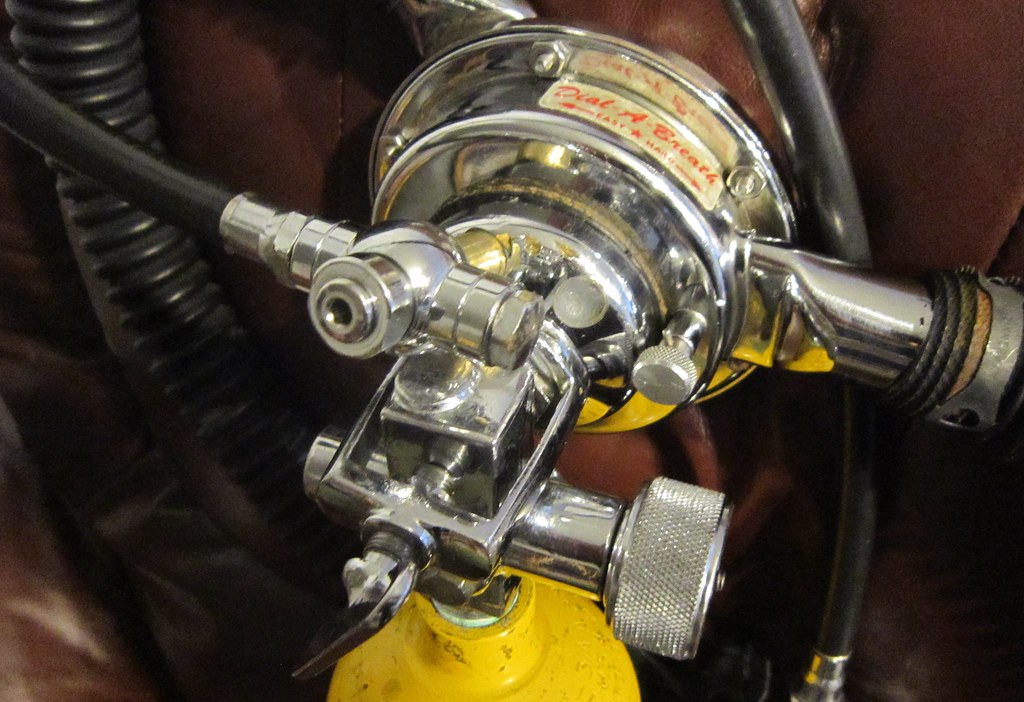 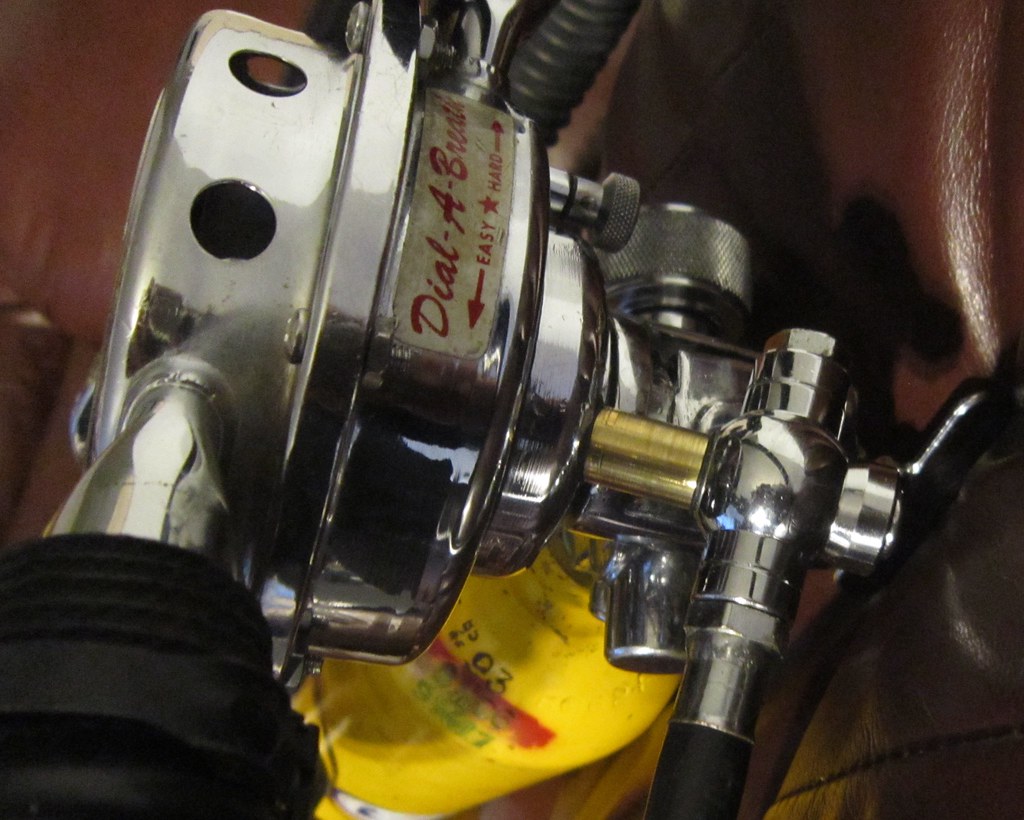

The ports work well! My Titan II second gets plenty of air flow. Of course, with the LP ports, I can hook up a BC inflator, AND check IP w/o my new fangled adapter! This C-2 is pretty beat up. It doesn't look bad, but the poor thing was very bent, and still is somewhat bent. One of the horns was badly bent sideways and the can kinda crushed in. I was able to straighten it mostly, but I cracked the horn by leaning on it too much. It doesn't hurt anything, but it just adds to the beat-upedness. I'll maybe solder it up later. But, it makes a good platform for experimenting. It also has a glued up main diaphragm. It had a tear in the flange and part way up the diaphragm. I used a special superglue for neoprene that works great. I put a backup ring over the flange like Dacor used on their very thin early units. Again, I wouldn't trust it much, but it does work! I don't think it's a bad breather. It's not as good as a GL, Mistral, HydroTwin II, or a Snark III, but it seems ok. Kinda like a DA, maybe? |
|
|
|
Post by vance on Dec 27, 2018 21:51:13 GMT -8
Here's a new IP adapter made out of aluminum. I bought some alu strap at Home depot to make the clamp. Much easier to work than the stainless. I ordered some 1/2" Delrin which I'll use for another one or two. Anyone want one? 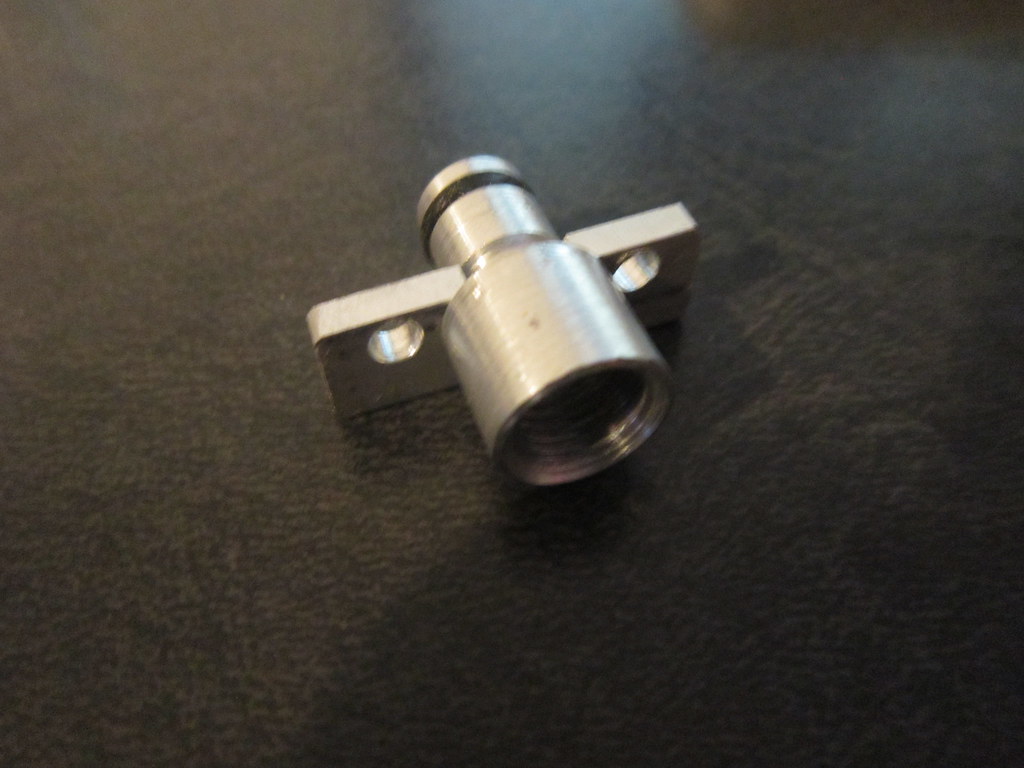 |
|
|
|
Post by herman on Dec 28, 2018 4:46:56 GMT -8
Here is another possible idea for the adapter. Rather than cutting the retainer groove in the part, how about making a small flange in the order of 0.100-0.150 thick - basically turn down the oring section to size, then turn the top section down to size leaving a ring/flange. Then the retainer could be a plate with a hole in it big enough for the upper section to go through...a light press fit would be great. It would leave a little space under the retainer but that's not a problem.....and you could add small orings to the screws to hold them in to prevent loss....A press fit and oring would make this a really neat adapter...
Hope you don't mind me toying with your design, I just find this kind of thing fun.
|
|
|
|
Post by vance on Dec 28, 2018 8:49:51 GMT -8
I don't mind at all! That's why I've posted this, as a matter of fact. I like collaborating with others to improve a design or idea. Keep 'em coming!
If the hole for the retainer plate was relieved for the adapter's flange, it would sit flat and not require shimming....Also, a relief in the screw holes under the plate would provide space for the o-ring screw retainers!
The adapter really needs some wrench flats to keep it from spinning while installing the gauge. I had to use pliers to get mine apart. A light press fit would be easily compromised if the body got turned in the retainer while screwing or unscrewing the gauge.
|
|
|
|
Post by surflung on Dec 28, 2018 8:57:55 GMT -8
Here's a new IP adapter made out of aluminum. I bought some alu strap at Home depot to make the clamp. Much easier to work than the stainless. I ordered some 1/2" Delrin which I'll use for another one or two. Anyone want one? Yes! I want one! I bought a C3 a year or so ago thinking I'd be able to adjust the IP. But when I checked how, I found there was no connector and I just lost interest in the project. |
|
|
|
Post by herman on Dec 28, 2018 9:40:05 GMT -8
Don't use a gauge in the adapter. First, it's dangerous, if....make that when.. you get a runaway IP the pressure has to go somewhere and an exploding gauge is the likely result...Hopefully not in your face. Secondly you need a way to relieve pressure and cycle the first stage, neither of which can be done with just an adapter and a gauge. Instead, put 3/8-24 threads in the adapter and make a gauge out of an old second stage and hose. A simple undercut at the top works fine as an oring groove and there is no need to tighten the hose more than finger tight. To add the gauge, cut the hose, insert a barbed nipple in each side, put a T adapter in the middle and install the gauge in the T. The 3/8 thread is much easier to do than a NPT and it requires almost no torque to install the hose, finger tight is fine. With an old second stage at the other end, you can cycle the first stage and if you get excessive pressure, the second stage acts as a relief valve. That is a much safer, easier way plus the gauge can be used with any reg or any similar adapter. I use one like it for a lot of regs.
|
|
|
|
Post by vance on Dec 28, 2018 9:55:56 GMT -8
After blowing up a different one w/o the bells and whistles, I now use a gauge with a bleed valve AND an OPRV. When I connect it to an unknown regulator, I open the bleed valve before turning it on, and slowly close it while watching the gauge. If it passes 150, I open up again and back off the IP adjuster. The gauge has a QR on it for use with a BCD hose, too. It's a nice clean setup. The adapter here is an M10 to 3/8 unf for my Snarks. It could also use some wrench flats as you can see by the visegrip marks  .  |
|
|
|
Post by vance on Dec 28, 2018 10:03:05 GMT -8
Yes! I want one! I bought a C3 a year or so ago thinking I'd be able to adjust the IP. But when I checked how, I found there was no connector and I just lost interest in the project. PM sent, Eben. |
|


 .
.
