|
|
Post by vance on Jan 3, 2020 14:40:25 GMT -8
I thought this thread might be of interest to a new member or two! Here's what you might start out with:   To end up with this:  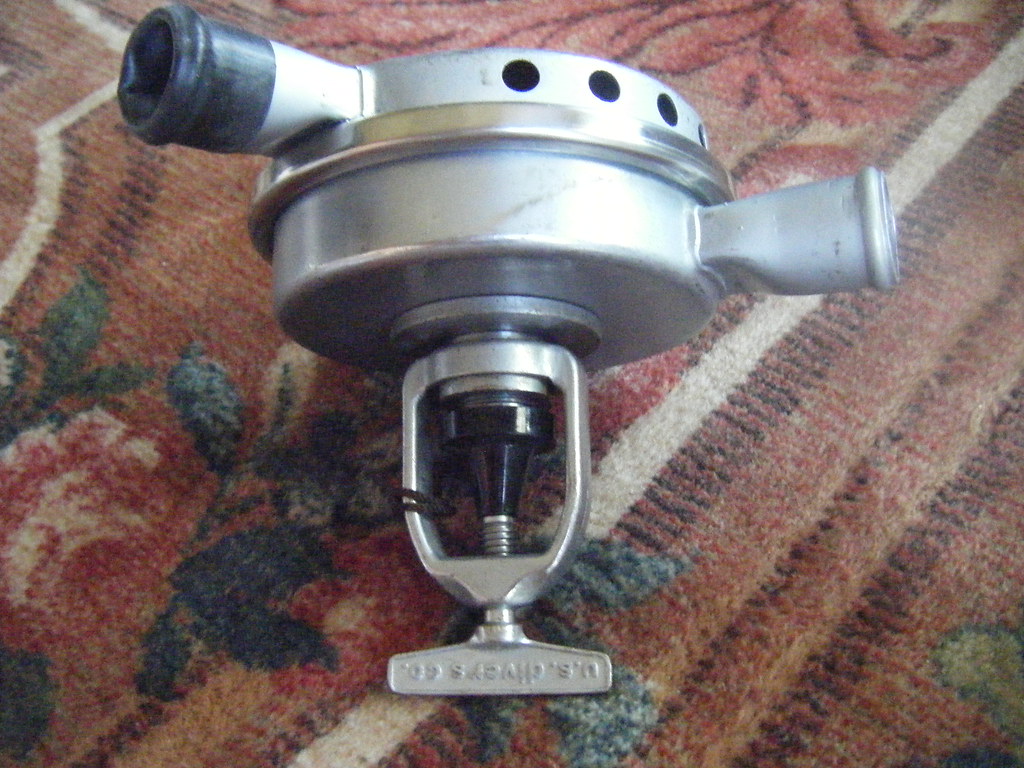 Here's the insides: 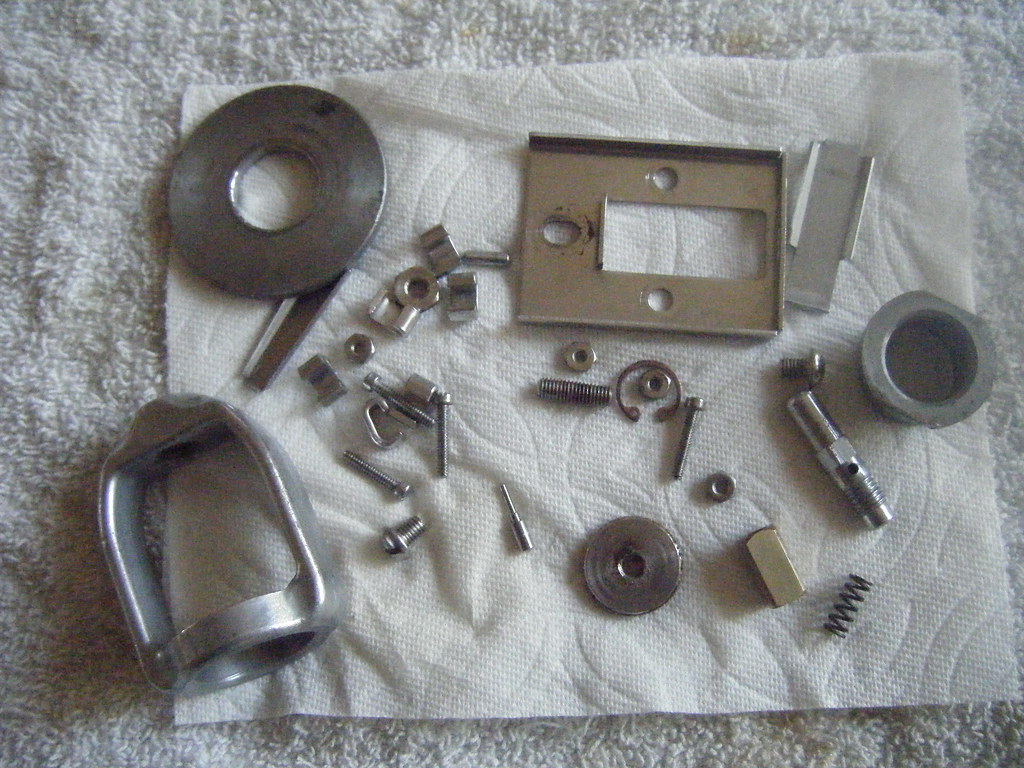 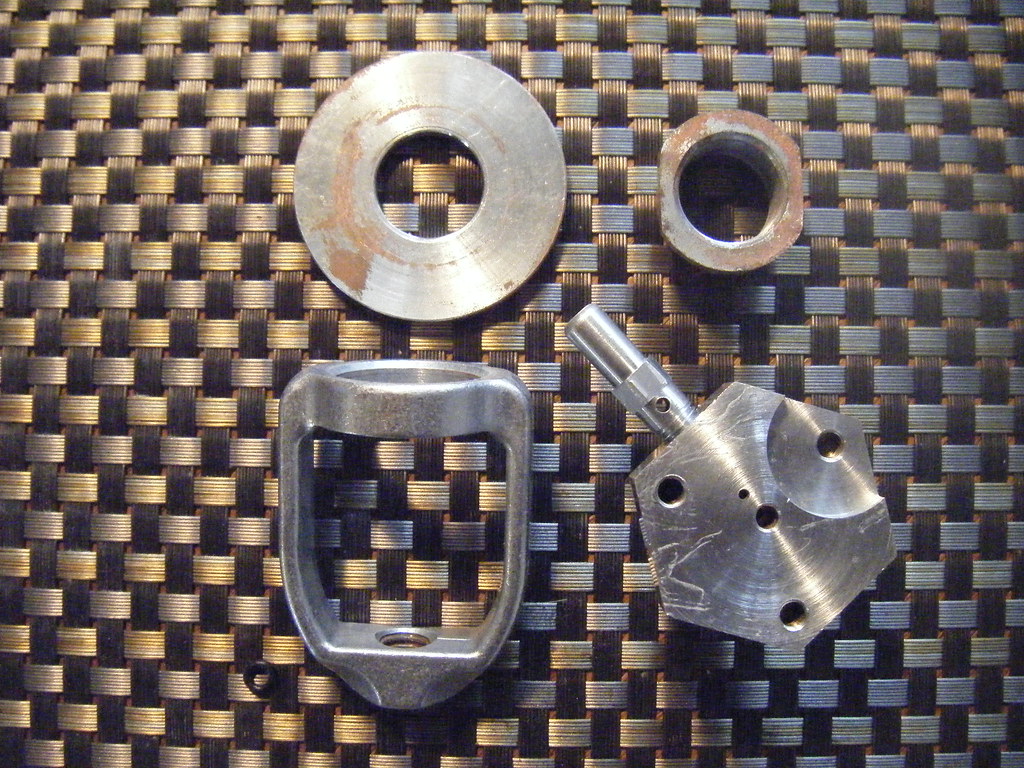 Note the tiny o-ring next to the end of the yoke on the bottom left. That's got to go inside the hole on the top of the Hex shaped valve (right in the middle). This can be a reason for bad words and grumpiness, but it can be done. |
|
|
|
Post by vance on Jan 3, 2020 14:47:50 GMT -8
Here's a bit more inspiration:  |
|
|
|
Post by vance on Jan 3, 2020 17:46:58 GMT -8
So the trick to rebuilding these is the HP valve o-ring. A new body gasket, possibly a new HP soft seat, and a repro silcone diaphragm will make it perform like new. Cleaning can be accomplished with a soak in 50/50 water/white vinegar (do 15 min intervals), a baking soda rinse (to kill the acid), a bit of soapy water gently applied with a sponge or cloth, and a bit of paint touching up the label. Be careful taking the label off the reg, as the tabs tend to break. I would not attempt to replace the HP o-ring at first. You'll need a brass pick tool. DO NOT use steel picks here! You'll gouge the seat. 90% of these will still hold air. I'd do everything else first and test. If it leaks, you'll go on to replace. Just try to get it working w/o this step, if possible. If it holds air, do the o-ring when you're ready. When you got the ganas, replace the o-ring in the HP valve. You need a brass pick to remove the old one, a bamboo skewer to stick up the orifice to keep it from trying to exit the orifice, and some silicone lube. Don't lube the o-ring with silicone. Pinch the sucker between your finger and thumb, and spit on it a litte. Worm it in. Use magnification. Look at how it is all squiggled up in the hole and try to coax it into the groove. When it's in, lube the pin with silicone grease and Bob's your uncle. For F's sake, don't use box clips on your rebuild. A case ring is the way to go. You can clean, maintain, and service so much more easily. Get one when you buy your parts. Here's agood place for everything: thescubamuseum.com/Online%20Store/onlinestore.htm#!/New-stainless-band-clamp-rings-for-Your-Voit-and-US-Divers/p/68507899/category=20208402 |
|
|
|
Post by herman on Jan 3, 2020 19:14:36 GMT -8
That oring is not a critical sealing oring. It stops air from moving around the pin but it's not a high pressure seal, a little flow around it is not a big deal as long as it's not so big as to affect the venturi. At rest there is ambient across it and at full flow there is maybe 100 or so psi across it, if it leaks a little, no biggie since the hole beside it is already bleeding a lot more. The bleed to control the venturi is supplied by the small hole in the top of the hex (just beside the pin hole) and on the venturi itself. Any flow past that oring is in addition to the bleed hole beside it. Even if there is significant flow around the oring, the only issue is it will cause a decreased venturi effect. The reg will not breath as good but it will still work. Bottom line, it needs to be there but it's no where near as critical as a piston stem oring.
|
|
|
|
Post by duckbill on Jan 3, 2020 23:52:18 GMT -8
For F's sake, don't use box clips on your rebuild. A case ring is the way to go. Ouch. As a purist, I cringe when I hear this. If you're going to throw the clips away, please save them for me. As far as I know, there is no source for newly produced clips, and people like me will desperately need them some day down the road and will be thankful to have them. |
|
|
|
Post by SeaRat on Jan 4, 2020 0:01:18 GMT -8
For F's sake, don't use box clips on your rebuild. A case ring is the way to go. Ouch. As a purist, I cringe when I hear this. If you're going to throw the clips away, please save them for me. As far as I know, there is no source for newly produced clips, and people like me will desperately need them some day down the road and will be thankful to have them. Hi Duckbill, My Mistral and RAM both have the original clamps, and I don't see much issue with them. They really aren't that hard to deal with, as long as you know the technique. I use a screwdriver to pry them back, and remove them with a vice grip. I then slightly straighten them with the vice grip before placing them where I want them, and, again using the vice grip, clamping them down. I usually do opposite sides, so that they get clamped evenly. My first go-around with the vice grip to initially clamp them is just to hold them in place. I then turn the vice grip's knob in a half turn or so, and really clamp them down. That way, they are in place and won't move. Here's a video I made while using my Mistral. John |
|
|
|
Post by scubalawyer on Jan 4, 2020 6:48:24 GMT -8
For F's sake, don't use box clips on your rebuild. A case ring is the way to go. Ouch. As a purist, I cringe when I hear this. If you're going to throw the clips away, please save them for me. As far as I know, there is no source for newly produced clips, and people like me will desperately need them some day down the road and will be thankful to have them. While I appreciate the purist c-clip approach, I take my DH reg cans apart after each dive trip (whether one day or a week long) so from a practical-ist perspective, c-clips are a PITA. Do love the look though.  A little off-topic, but the only "pure" restoration I have ever done (down to the c-clips), is a 2-stage Voit VR-2 Mariner. Works as great as a non-venturi assist reg can, but I have only used it in fresh water a few times. For anyone intetested in that rebuild, I started a fairly extensive thread a while back over on VDH. www.vintagedoublehose.com/forum/viewtopic.php?f=4&t=9541I have several NOS c-clips in my parts boxes. I plan on doing an original restore to an AquaMaster. 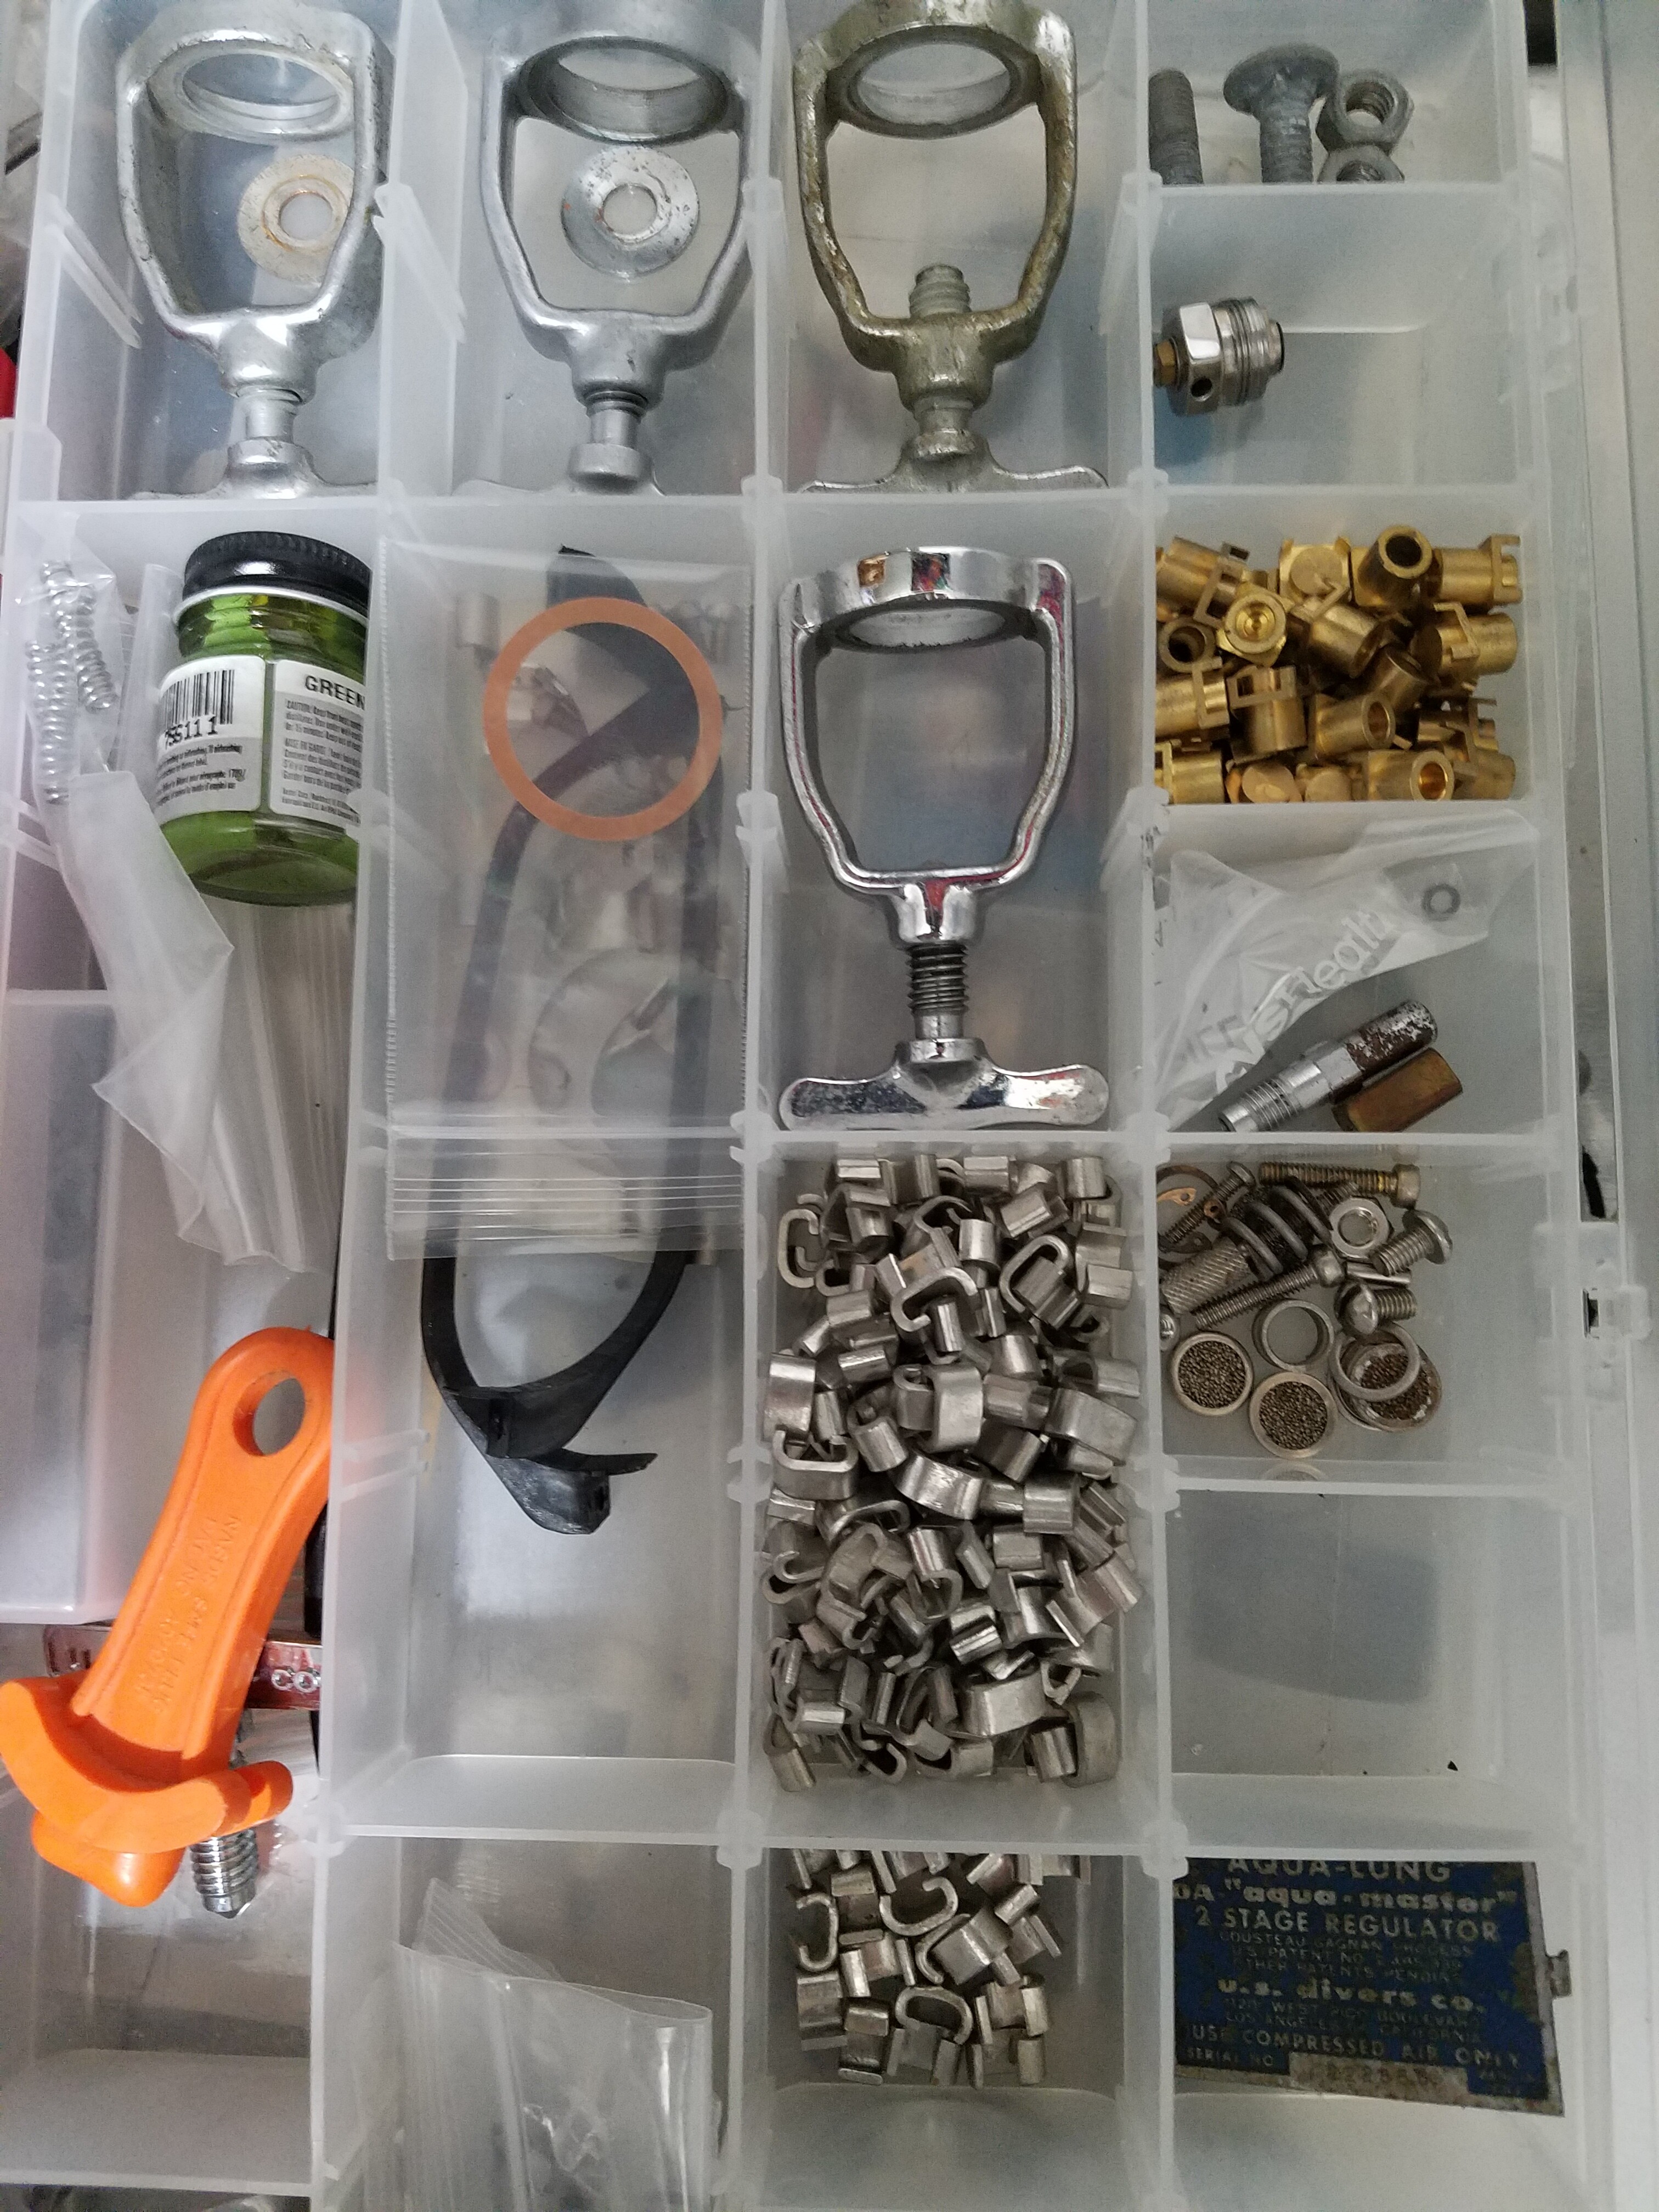 |
|
|
|
Post by vance on Jan 4, 2020 9:40:54 GMT -8
Point taken, Terry! But I didn't mean to say to throw them away!
As Mark says above, if you want to make it easier to take the regulator apart for cleaning, adjusting, or maintenance, the case ring makes it so much more convenient. As you suggest, a collector is going to want them on the regulator for authenticity.
I like DBEs, also, but these aren't permanent changes to the regulator.
|
|
|
|
Post by herman on Jan 4, 2020 10:03:12 GMT -8
Same here, I have a number of them, all removed for replacement with a band clamp. What I want to know is why on earth do you have some many balance chambers? |
|
|
|
Post by scubalawyer on Jan 4, 2020 10:13:32 GMT -8
Same here, I have a number of them, all removed for replacement with a band clamp. What I want to know is why on earth do you have some many balance chambers? Who doesn't? I was given a large bag of NOS parts about 2 years ago. The balance chambers were part of that gift. |
|
|
|
Post by vance on Jan 4, 2020 16:57:21 GMT -8
Mistral Rebuild Pt1:
So, the deal here is, get the hoses off, get the clips off, take the valve out, soak the cans in denatured alcohol, hot water, or whatever works for you to get it clean and to remove the remains of the old duckbill. Take the valve apart, check the pieces, and THEN....
Soak it all in the sonic cleaner, vinegar bath, or whatever. Then rinse it all (esp., in baking soda if you used vinegar), wipe it down with soapy water, dry and reassemble. Mount it on a tank @2500 psig or less without the diaphragm and bottom can. Turn on the air. If it hisses at you, you have a leaky HP valve seat, a bad hard seat (VERY uncommon), or the o-ring on the tank valve isn't seated. Some valves don't work well with old regs. Get a spray bottle with soapy water and spray the tank valve/yoke connection and the HP valve.
PT 2 is coming!
|
|
|
|
Post by vance on Jan 4, 2020 17:44:57 GMT -8
I really do appreciate Terry's reminders about the historical value of these regulators and other equipment. Thanks, man.
This stuff is rare and irreplaceable, even though it might seem to be all over the place. There are lots of examples of Mistrals, Scubas, Deluxes, GLs, DAs, Snark IIIs, etc., but they are going to be gone pretty soon.
It is true that people like me, who like to hotrod this stuff by making mods to parts that can't be returned to stock, are contributing, if they aren't mindful, to the rarity of original examples. This is a pretty common trend over the years. Hotrods, dude.
But hotrods are a kind of conservation. Hotrodders take, often, really rusty, crappy, wrecked, nearly unsalvageable hulks and bring them back again. I like to think that's what I'm doing.
I do make the utmost attempt to not modify a pristine-to-good example of a vintage part. I will always look for an orphan, poor, or otherwise not so good part to make modifications on. I agonize over it. But, in the end, when I mod a part that works to improve the usefulness of the old stuff, I'm OK with it.
|
|
|
|
Post by vance on Jan 5, 2020 12:44:23 GMT -8
Mistral Rebuild Part 2:
Get out your wallet.
|
|
|
|
Post by vance on Jan 5, 2020 12:53:46 GMT -8
Mistral Rebuild Pt3:
Buy some beautiful new hoses, and all the other parts you need. Neoprene exact reproductions in yellow or black are available at Vintagescubasupply.com. These are nice hoses and are for the purist, but need care and will take a set over time.
Silicone hoses are also available from TheScubaMuseum.com and Vintagedoublehose.com. Silicone will last longer than most of us, are very flexible, and come in several colors besides black and yellow.
Mouthpieces, wagon wheels, non-return valves, duckbills, duckbill eliminators (DBEs), service kits, case rings, and individual parts are also available from the above sellers.
This is how a $100 Mistral becomes a $350 Mistral.
|
|
|
|
Post by vance on Jan 7, 2020 15:56:35 GMT -8
When you've got your parts and everything is assembled except the bottom can diaphragm and clamp ring, and it doesn't hiss when you put it on the tank and pressurize it:
This is how I adjust my levers: I like to use an allen setscrew. This isn't necessary, but I find it's easier to keep track of position with the allen key as an indicator. This gives you a "clock" to position the screw and keep it in place while tightening the nut. I keep a small ignition box wrench on the nut and the key in the screw. Hint: tightening the nut changes the setscrew position a tiny bit in the threads.
Initially, I set the lever to be about 3/16 above the rim of the can (while sighting across, edge-to-edge). I do it by eye, but you can make a simple straightedge gauge, or use a ruler across the can. Put the diaphragm on and see if it's raised too high. The diaphragm won't sit right and won't seat all the way around if it's too high. (New silicone and used OEM diaphragms require different lever settings.)
If the diaphragm edges settle in the groove, gently press or lightly tap the diaphragm center to get a feel for when it contacts the lever. The diaphragm "stands up" on it's own. It doesn't sag much. If the lever's too low, you'll feel a gap. I like a very tiny gap. You'll get a feel for this. If it doesn't seem to have a gap, I'd lower the setscrew 1/8 turn and try again.
When you think it's right, put it on the tank. Put the diaphragm on and hold the bottom can in position. Turn on the air. If it hisses, you have to lower the lever. If it doesn't, try raising the lever a hair until it does, then back off 1/2 of what you raised it. Etc.
|
|


 A little off-topic, but the only "pure" restoration I have ever done (down to the c-clips), is a 2-stage Voit VR-2 Mariner. Works as great as a non-venturi assist reg can, but I have only used it in fresh water a few times. For anyone intetested in that rebuild, I started a fairly extensive thread a while back over on VDH.
