|
|
Post by technidiver on Nov 2, 2019 10:02:32 GMT -8
|
|
|
|
Post by SeaRat on Nov 2, 2019 14:16:46 GMT -8
Dustin, I am the guy who got your pilot. Thanks. Did you ever find a service manual? Been messing with the air1, trying to get that diaphragm back in. I just keep thinking, man there has got to be a better way. With the diaphragm on the AIR I, you've got to attach the loop to the demand lever first. Push it through the opening into the case, turn it 90 degrees (from memory) so that the slot alligns with the rectangular opening on the lever, slide it through sideways, then pull the diaphragm out and position it around the outside. The clip can then be applied carefully so as to not puncture the diaphragm, and slid into place. Again, this is from memory a few years back, but it is not too difficult. Be very careful of the diaphragm, so as to not puncture it. John |
|
|
|
Post by SeaRat on Nov 2, 2019 14:19:27 GMT -8
Actually, what DA Aquamaster says in this thread is not quite correct, according to Tony Christianson. Here's what DA Aquamaster posted: The main reason, according to Tony, they went with the AIR I was to get out from under his patent, and the royalties that he was being paid for the Pilot regulator. This was all in-house, so the AIR I did not cost Scubapro royalties. The original AIR I case was to be for the Pilot innards, but then Scubapro decided to do a redesign in-house. John |
|
db
Regular Diver

Posts: 23
|
Post by db on Nov 2, 2019 17:27:16 GMT -8
It’s the clip that is the tough part.
|
|
|
|
Post by morris75 on Nov 2, 2019 19:12:14 GMT -8
Dustin, I am the guy who got your pilot. Thanks. Did you ever find a service manual? Been messing with the air1, trying to get that diaphragm back in. I just keep thinking, man there has got to be a better way. Looks like the Pilot was delivered today. No manual yet, but have decided to open one up tomorrow and see what happens. On AIR1, I do not usually need to remove the diaphragm clip. I carefully roll the diaphragm back and partly out of the body, then push the housing assembly out the top for service. As shown in the AIR1 manual. Hoping to be able to do the same on the Pilot, at a glance it appears that should work. I have removed the diaphragm clip in the past and do recall some difficulty getting it reinstalled. |
|
|
|
Post by SeaRat on Nov 2, 2019 21:19:27 GMT -8
The Pilot has a different mechanism. Before you decide to open the pilot up, try pressurizing it and see whether it leaks or not. If not, maybe you don't need to do much initially.
John
|
|
|
|
Post by morris75 on Nov 3, 2019 6:51:45 GMT -8
The Pilots have free flowed slightly since I received them, figured best do a rebuild and learn more about them before getting them in the water.
The Pilot to AIR1 internals conversion was done during coffee this morning, it was a plug and play procedure. Not sure if it was necessary, but switched out the diaphragm back up disc and rod assembly also. The Pilot internals dropped into the AIR1 housing easily and retainer cap etc a perfect match, as it seems was intended. The diaphragm clips were not removed for the process.
The converted Pilot is ready to dive, I am waiting on a few 50 durometer orings to arrive before servicing the Pilots and completing the Pilot into AIR1 switch.
|
|
|
|
Post by SeaRat on Nov 3, 2019 8:07:34 GMT -8
Wonderful news! It will be interesting to get your report on how they dive. Two main things about the pilot:
--The Allen wrench adjustment just where the demand lever comes in is critical. That was what caused the leak on mine (being too tightly adjusted).
--The Venturi opening needs adjusting way to the side. If it's too far forward, it can pump so much air out the opening that you could get a lung injury. It's that powerful. Tony Christianson originally had an adjustment that could be done while diving for the Venturi, but decided that would not be good. As I said, it needs to be adjusted so that when a purge button free flow is initiated, it self-stops.
Best wishes, and I'm really interested in how the AIR I --> Pilot conversion goes. That will be one unique regulator. I have my original AIR I, which I purchased new in the late 1970s or early 1980s (a while ago) with my Pilot on it too.
John
|
|
|
|
Post by SeaRat on Nov 3, 2019 17:41:57 GMT -8
Morris,
I took one of my AIR I's apart a bit, took the cover off and took the clip and diaphragm out. I looked it over, then replaced the diaphragm. The diaphragm has that slot in the attachment pin that goes onto the main lever, and it is slanted. If you orient it one way, it is hard to get on, but the other way, it is much easier.
Concerning the clamp, I initially took it off pretty easily with a watch screwdriver into the hole that the clip spring goes into, and pushed it down. With a twisting motion, it came out pretty easily. I then put the diaphragm back onto the lever, making sure it was outside the can and sealing, then put the clamp down into the area. I tried once, and did not get it right. But the second time, I used my finger (little finger, I think) to push it into the hole and around the clamp inside the box, and lifted up slightly while pushing it toward the edge where it would go over the lip and clamp down. That worked! I then tested it by ensuring that I had a water-tight seal by inhaling slightly (too hard an inhalation can pull the top of the diaphragm right into the housing). With that assurance, I put the hose back on (I had taken the LP hose off), pressurized it, and breathed off it in both the "Pre-Dive" and "Dive" positions, and it worked perfectly. Finally, I put the diaphragm cover back on, using two Allen wrenches held together with my fingers (I used this to take the cover off too).
'Hope this helps.
John
|
|
|
|
Post by morris75 on Nov 3, 2019 20:10:35 GMT -8
John, your tips and ideas are appreciated. For this project, I have also been able to fall back on experience gained working on Scubapro D series regulators. There are similarities even on the Pilot, and the AIR1 is almost the same. Unfortunately, my dive season is probably over until next summer so the fun of in water testing will have to wait until then. For easy and damage free removal of the Pilot and AIR1 covers, I use adjustable pin spanner with 4mm pins. Cost was $2.50 on ebay, they are usually sold for changing wheels on angle grinders. 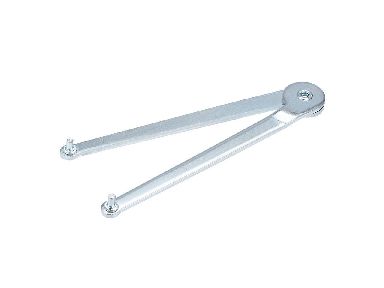 |
|


