|
|
Post by Tusker on Mar 7, 2023 15:41:51 GMT -8
All right you terrible influences, here's that USD doubles manifold:  Sheesh, talk about peer pressure  It needs a good clean, but I don't think I'll get around to it until I have a set of 1/2" 72s to attach it to. Well, the day has come. I went by to get my tanks earlier today and the shop owner told me he had a tank waiting for me — sure enough, a 1/2" NPT Steel 72 was waiting by the door, covered with lots of cracked blue paint and a bright yellow Dacor boot. It seems to be at an equal height, so I'm taking it for a hydro later this week to make a set of doubles. The diagram of a slightly later 3/4" valve from Basic Scuba seems to get the point across, but is there anything in particular I should know before getting into this one? My last valve job has turned out quite successful other than the knob being a great pain to get going — I feel as though I should have added some silicone grease to the valve seat threads. Jacob |
|
|
|
Post by cnotthoff on Mar 7, 2023 16:03:06 GMT -8
I can't recall if the reserve mechanism retainer on this era manifold is sealed with a rubber gasket the way later ones are. When I'm at the shop tomorrow, I'll scan my old US Divers diagram and send it along. I have drawer full of the reserve mechanisms and some those gaskets for this manifold.
There's a certain amount of joy in removing that plug on the non-reserve side, much like ripping that tag off your mattress.
How do you guys feel about flipping the center unit so that the knob is down? I can see pros and cons to doing this, particularly if you are using a double-hose.
Good Dives,
Charlie
|
|
|
|
Post by SeaRat on Mar 7, 2023 16:56:36 GMT -8
A couple of things to think about.  IMG_1445 IMG_1445 by John Ratliff, on Flickr First, the main knob's seat. It can be domaged by tightening it down too tight. Check it.  IMG_1444 IMG_1444 by John Ratliff, on Flickr On the other side, this is what a good seat looks like.  IMG_1442 IMG_1442 by John Ratliff, on Flickr There is a Teflon ring that seats the top surface. The other thing to realize is that Teflon tape needs to be used on the 1/2 inch manifold where it screws into the tanks. Not too many people remember how to apply the Teflon tape. It needs to go on so that when screwed on clockwise, the loose end is clamped to the threads, and doesn't try to unwind. That means, I think, that you need to put in onto the threads counter-clockwise. Then, you need a really big wrench to tighten the threads against each other with the Teflon tape in place. You need about three+ turns of Teflon tape on the threads in order to make the seal too. Now, about the question Carl broughtt up; I vote for the knob to be up, which places the double hose regulator down between the two tanks further. But I also vote for flipping the center section horizontally so that it is going in "backwards," which places the J-valve on the other, right side, with the J-valve arm toward the the diver's shoulder. It's very difficult to accidentally hit it and knock the reserve down that way. The harness should be on the regulator side too, otherwise the regulator is way too far from the diver's back. 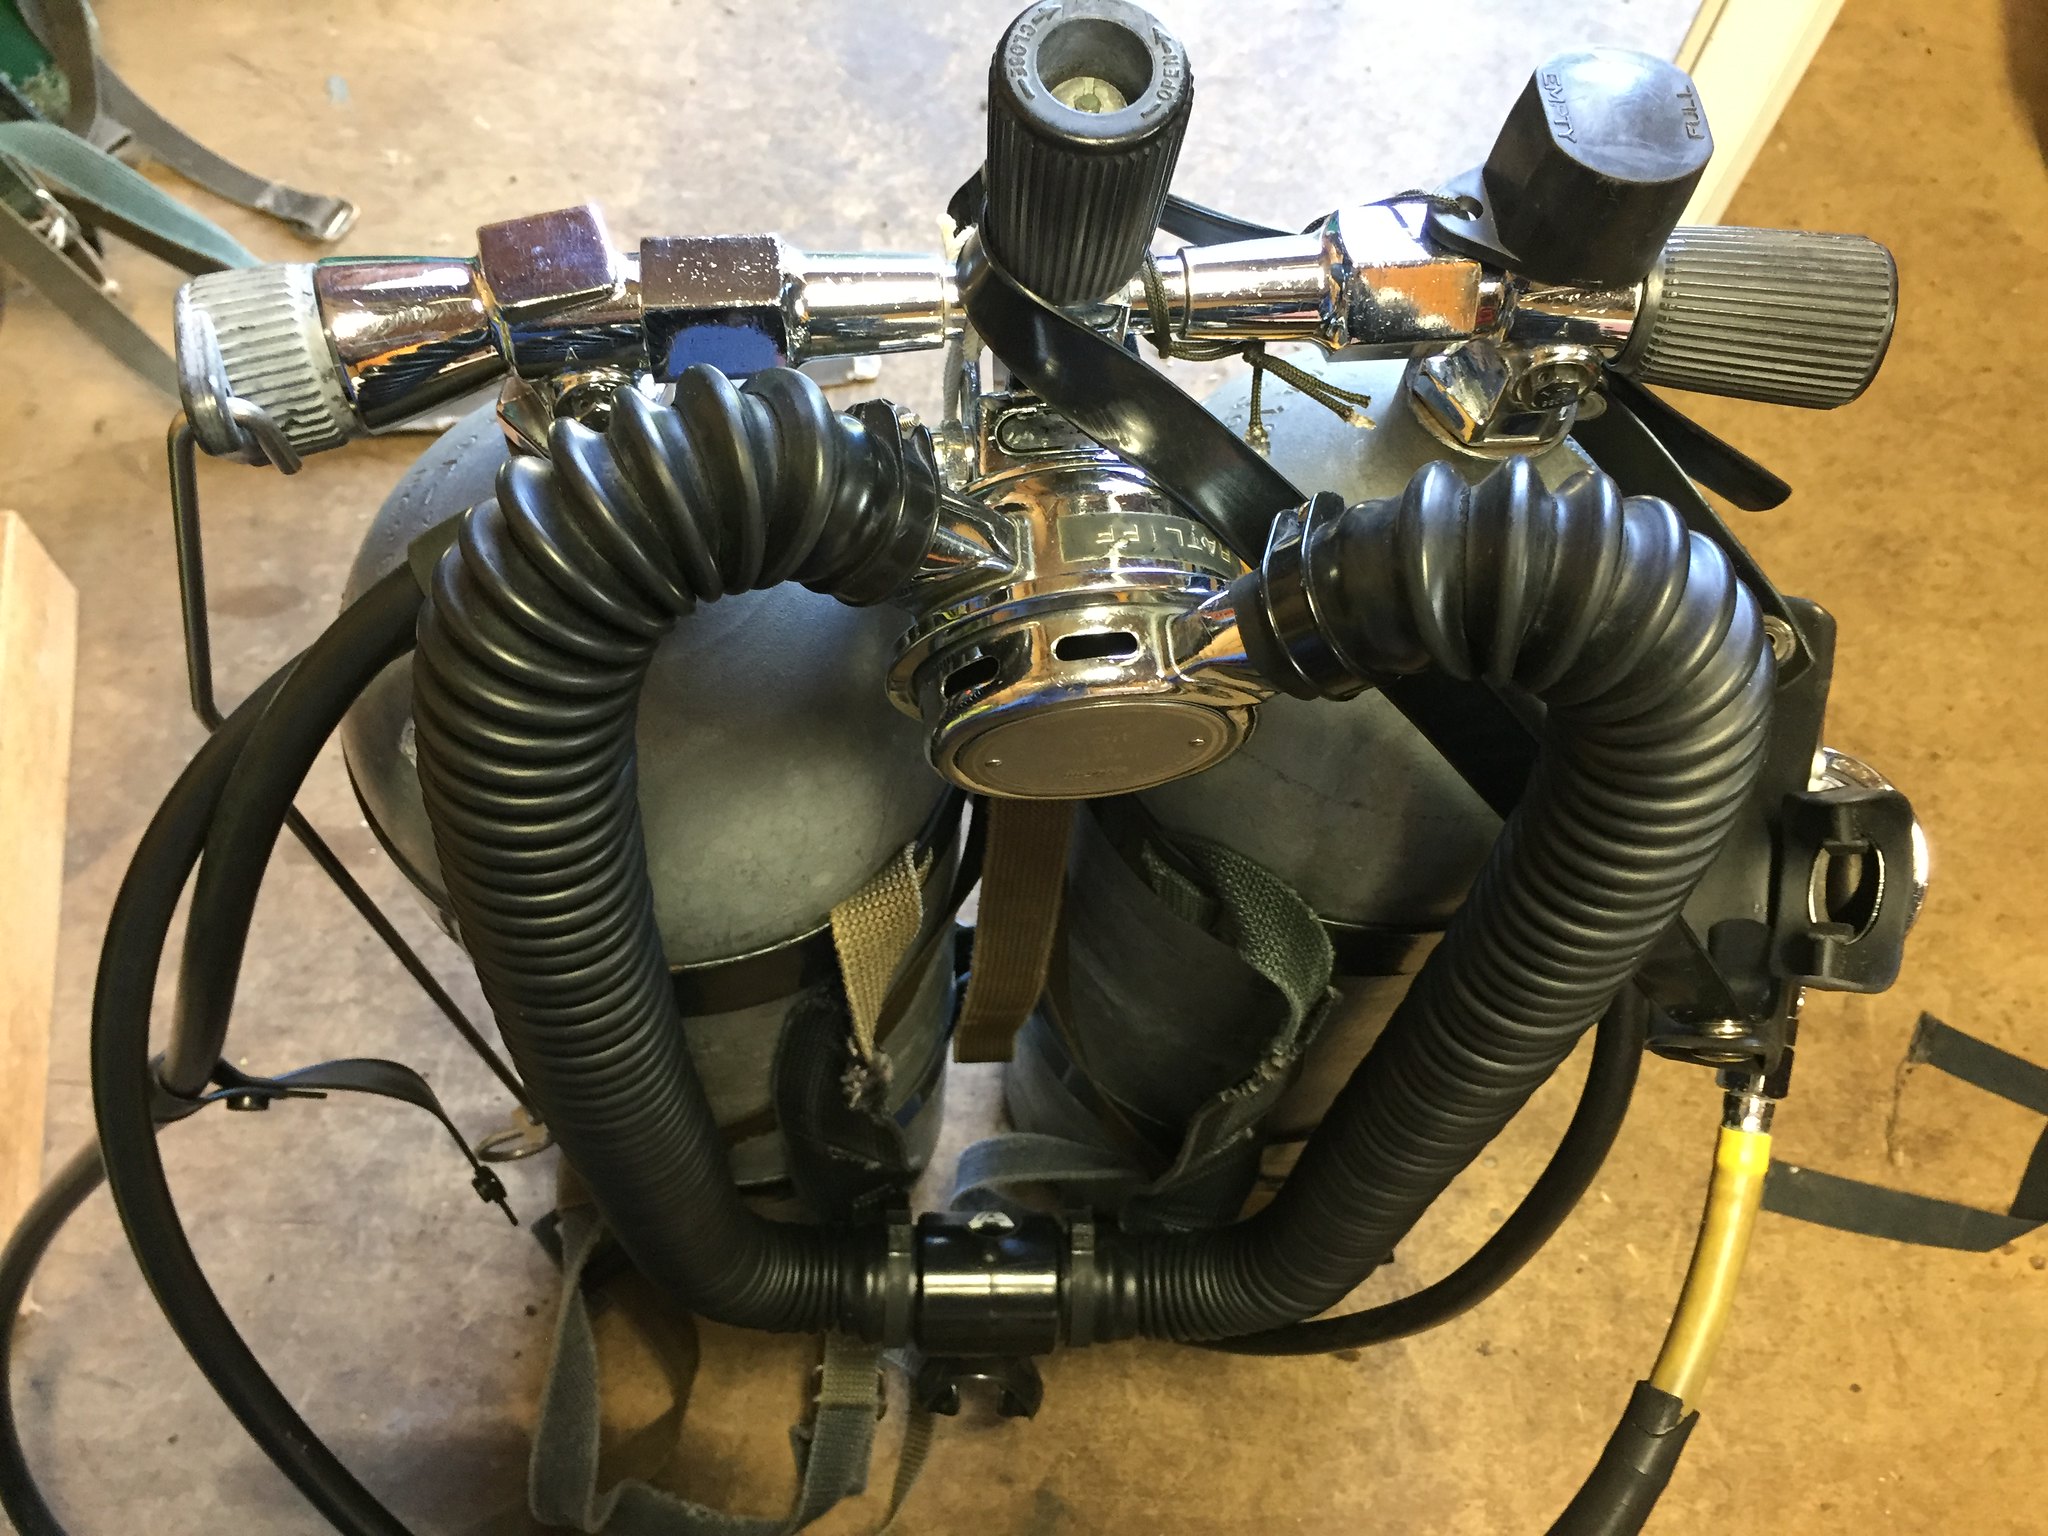 IMG_1456 IMG_1456 by John Ratliff, on Flickr Here's an example of the reversed center section, with the reserve lever toward the diver's shoulder. John |
|
|
|
Post by Tusker on Mar 9, 2023 7:23:29 GMT -8
This is great, thank you! I’ve broken down the manifold into it’s three components but I haven’t started stripping it down yet. The burst discs are the old lead screw-in type and I can’t get them to come loose with just a screwdriver.
Jacob
|
|
|
|
Post by SeaRat on Mar 9, 2023 11:04:11 GMT -8
Yes, those burst discs need to be replaced with a modern one which has three or four openings which will not cause the cylinders to jet around.
I've been trying to find my photos of the inside of the J-valve. The side with the lever is fairly easy to get to, but there is more mechanism visible on the inside. I'll see what I can find.
John
|
|
|
|
Post by cnotthoff on Mar 9, 2023 14:12:48 GMT -8
Here's a diagram of the early USD manifold. This shows it with 3/4 NGS threads. It's the same gubbins as your's with 1/2" mpt.  USDR USDR by Charlie will, on Flickr |
|
|
|
Post by cnotthoff on Mar 9, 2023 14:27:57 GMT -8
Getting at those burst disks secured with the old lead-plug screwdriver-slot plugs is a pain in the butt. I have a screwdriver that I've especially modified to fit tightly in that slot. It required some grinding on a large-bladed screwdriver.
When they are really stuck, I secure the valve in a vise on my drill press table, with the burst plug directly below the chuck. Health and safety will tell you to unplug the drill press. I fit my specialty screwdriver in the slot and use the drill press to apply pressure so the screwdriver stays vertical and won't slip out of the slot. A wrench on the screwdriver allows me to apply more torque than seems reasonable to that nasty little plug.
I think we've covered the boiling-water soak as a way to heat scuba parts without going too far.
Be very careful with gasket #2. It's plastic and will crack if you try to pry it off cap #1. If gasket #19 is a hard black rubber, I have some of those. If everything is working and not too gunky, you can leave plug #18 in place. It is brass and the hex opening may strip out with too much force.
Good Luck and Good Dives,
Charlie
|
|
|
|
Post by vance on Mar 9, 2023 15:57:45 GMT -8
I want to make it clear that that you don't turn the drill press on! You imply this by saying that unplugging is recommended, but let's put it right out there!
You're simply using the drill press quill to apply downward pressure while you turn the chuck by hand, right?
|
|
|
|
Post by cnotthoff on Mar 9, 2023 21:21:33 GMT -8
I want to make it clear that that you don't turn the drill press on! You imply this by saying that unplugging is recommended, but let's put it right out there! You're simply using the drill press quill to apply downward pressure while you turn the chuck by hand, right? Roger that. It's just a method of keeping the screwdriver from slipping out of the slot and stripping the screw. I don't even touch the chuck. A wrench on screwdriver flats provides the torque. Since I haven't seen backside pics, it occurred to me that this manifold may have the lead-filled plugs that are removed with a 3/8" socket. Good Luck and Good Dives, Charlie |
|
|
|
Post by Tusker on Mar 10, 2023 5:12:12 GMT -8
I don’t have a drill press, but I understand the general idea. I’ll try and work something out to where I can get the needed leverage.
Unfortunately it is not a 3/8” plug. If I’m reading the stamp on the center section correctly, this manifold is from 1962. I imagine it’s spent at least forty of the ensuing years with these screw disks in it.
Jacob
|
|
|
|
Post by Tusker on Dec 27, 2023 11:39:06 GMT -8
In light of my current project, I set about trying to strip the manifold down this morning. A few problems encountered: part no. 12 on Charlie's diagram is incredibly snug, it has not budged even with a little percussive persuasion (re: hitting the wrench with a rubber mallet. Part no. 8 on the diagram, the screw holding on the reserve lever and spring, has also refused to move and would prefer to mar the now-thin coating to reveal some brass. The burst disks are still being themselves.
Would the best course of action be a round through the ultrasonic to (hopefully) loosen up the gunk followed by very warm water to relax the parts?
Jacob
|
|
|
|
Post by antique diver on Dec 27, 2023 12:18:25 GMT -8
In light of my current project, I set about trying to strip the manifold down this morning. A few problems encountered: part no. 12 on Charlie's diagram is incredibly snug, it has not budged even with a little percussive persuasion (re: hitting the wrench with a rubber mallet. Part no. 8 on the diagram, the screw holding on the reserve lever and spring, has also refused to move and would prefer to mar the now-thin coating to reveal some brass. The burst disks are still being themselves. Would the best course of action be a round through the ultrasonic to (hopefully) loosen up the gunk followed by very warm water to relax the parts? Jacob If 12 isn't budging please use a 6 point socket or 6 point closed end wrench to keep the corners from getting rounded off. That could leave it stuck forever. Using an adjustable or even open end wrench on something that tight would be asking for trouble on the soft brass. Part 8 is a common problem, sometimes ending up with the stem 14 breaking, but I should have some available if that happens. I soak those in acid bath or hot CLR if something like PB Blaster doesn't work. 20% acetic acid (not kitchen vinegar which is typically 5%) works pretty well, and is usually available at Home Depot or garden centers. I have also used one part pool acid in 3 parts water for stubborn parts. Protective eyeglasses should always be used when dealing with those. Those solutions all work better in an ultrasonic cleaner. Good luck! |
|
|
|
Post by vance on Dec 27, 2023 17:12:15 GMT -8
If all else fails, and parts are available, a torch can work wonders.
|
|
|
|
Post by duckbill on Dec 27, 2023 23:29:06 GMT -8
A word of caution: "Pool acid" is hydrochloric (Muriatic) acid, and will strip the flash of chrome in a heartbeat. I would opt for acetic or heat, personally.
|
|
|
|
Post by SeaRat on Dec 28, 2023 3:06:45 GMT -8
A word of caution: "Pool acid" is hydrochloric (Muriatic) acid, and will strip the flash of chrome in a heartbeat. I would opt for acetic or heat, personally. Hydrochloric acid will also do a number on an eye; be very cautious and wear goggles and gloves when using muriatic acid (which is concentrated hydrochloric acid). John |
|


